
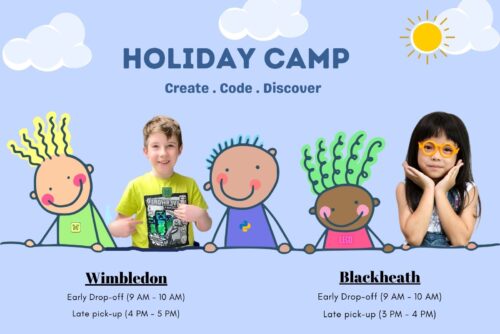
Python Coding 2, Easter Holiday Mini-Camp (14th April – 17th April 2025) – AM
Python Coding 2 is suitable for students who have either completed our Python Coding 1 course or who have experience coding in Python. It is designed for late primary to secondary aged students who are looking to take their Python programming skills to the next level.
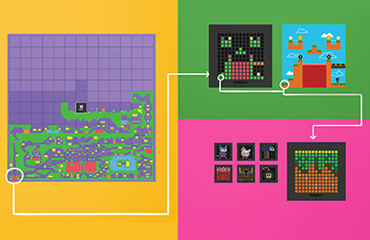
Python 2 builds on the principles covered in Python 1 and covers object oriented programming in greater depth. Children will start to use popular Python libraries such as Pandas, Skikit for machine learning, and PyGame. We will also explore web development techniques using Python libraries such as Django.
The objective of the Python 2 course is to help children become confident and independent programmers.
- Learn Python syntax (structure)
- Object oriented programming
- Use loops and conditionals (IF/THEN/ELSE)
- Understand variables (number, Boolean, string)
- Create and use functions
- Graphics and web design frameworks
- Data science and machine learning techniques
Python Coding 2, Easter Holiday Mini-Camp (14th April – 17th April 2025) Timetable:
[table id=14 /]
What you would need:
- Zoom (download here)
- A laptop/computer (PC or Mac) with Python installed (download here)
Challenges may vary depending on the child’s age/ability as we have multiple streams running within each session.
System Requirements: A computer (PC or Mac).
Age Requirement: 10+
Pre-requisite: Completed Python 1 or a Python holiday camp with Code Kids, or prior significant experience in Python.
Python Coding 2, Easter Holiday Mini-Camp (14th April – 17th April 2025) – AM
£156.00
In stock
[fusion_builder_container hundred_percent=”no” hundred_percent_height=”no” hundred_percent_height_scroll=”no” hundred_percent_height_center_content=”yes” equal_height_columns=”yes” menu_anchor=”” hide_on_mobile=”small-visibility,medium-visibility,large-visibility” status=”published” publish_date=”” class=”pro-four-col-sec” id=”” background_color=”” background_image=”” background_position=”center center” background_repeat=”no-repeat” fade=”no” background_parallax=”none” enable_mobile=”no” parallax_speed=”0.3″ video_mp4=”” video_webm=”” video_ogv=”” video_url=”” video_aspect_ratio=”16:9″ video_loop=”yes” video_mute=”yes” video_preview_image=”” border_color=”” border_style=”solid” margin_top=”” margin_bottom=”” padding_top=”” padding_right=”” padding_bottom=”” padding_left=”” type=”legacy” flex_align_items=”stretch”][fusion_builder_row][fusion_builder_column type=”1_1″ layout=”1_1″ spacing=”” center_content=”no” link=”” target=”_self” min_height=”” hide_on_mobile=”small-visibility,medium-visibility,large-visibility” class=”” id=”” background_color=”” background_image=”” background_image_id=”” background_position=”left top” background_repeat=”no-repeat” hover_type=”none” border_color=”” border_style=”solid” border_position=”all” padding_top=”” padding_right=”” padding_bottom=”” padding_left=”” margin_top=”” margin_bottom=”” animation_type=”” animation_direction=”left” animation_speed=”0.3″ animation_offset=”” last=”true” border_sizes_top=”0″ border_sizes_bottom=”0″ border_sizes_left=”0″ border_sizes_right=”0″ first=”true”][fusion_content_boxes layout=”clean-vertical” columns=”1″ link_type=”button” button_span=”” link_area=”” link_target=”” icon_align=”left” animation_type=”” animation_direction=”left” animation_speed=”0.3″ animation_delay=”” animation_offset=”” hide_on_mobile=”small-visibility,medium-visibility,large-visibility” class=”” id=”” title_size=”18px” heading_size=”2″ title_color=”” hue=”” saturation=”” lightness=”” alpha=”” body_color=”” backgroundcolor=”#f4f4f4″ icon=”” iconflip=”” iconrotate=”” iconspin=”no” iconcolor=”” icon_circle=”” icon_circle_radius=”” circlecolor=”” circlebordersize=”” circlebordercolor=”” outercirclebordersize=”” outercirclebordercolor=”” icon_size=”60″ icon_hover_type=”” hover_accent_color=”” image=”” image_id=”” image_max_width=”” margin_top=”” margin_bottom=””][fusion_content_box title=”Python Coding” backgroundcolor=”” icon=”” iconflip=”” iconrotate=”” iconspin=”no” iconcolor=”” circlecolor=”” circlebordersize=”” circlebordercolor=”” outercirclebordersize=”” outercirclebordercolor=”” image=”https://blackheath.codekids.org/wp-content/uploads/2019/05/python.jpg” image_id=”4534|full” image_max_width=”300″ image_height=”” link=”” linktext=”Read More” link_target=”_blank” animation_type=”” animation_direction=”left” animation_speed=”0.3″ animation_offset=””]
Learn the world’s fastest growing and most popular text-based programming language used by actual code developers and computer scientists!
[fusion_modal_text_link name=”read_more_python” class=”prod-popup-btn” id=””]READ MORE[/fusion_modal_text_link]
[/fusion_content_box][/fusion_content_boxes][/fusion_builder_column][/fusion_builder_row][/fusion_builder_container][fusion_global id=”3277″][fusion_builder_container hundred_percent=”no” hundred_percent_height=”no” hundred_percent_height_scroll=”no” hundred_percent_height_center_content=”yes” equal_height_columns=”no” menu_anchor=”” hide_on_mobile=”small-visibility,medium-visibility,large-visibility” status=”published” publish_date=”” class=”” id=”” background_color=”” background_image=”” background_position=”center center” background_repeat=”no-repeat” fade=”no” background_parallax=”none” enable_mobile=”no” parallax_speed=”0.3″ video_mp4=”” video_webm=”” video_ogv=”” video_url=”” video_aspect_ratio=”16:9″ video_loop=”yes” video_mute=”yes” video_preview_image=”” border_color=”” border_style=”solid” margin_top=”” margin_bottom=”” padding_top=”” padding_right=”” padding_bottom=”” padding_left=”” type=”legacy”][fusion_builder_row][fusion_builder_column type=”1_1″ layout=”1_1″ spacing=”” center_content=”no” link=”” target=”_self” min_height=”” hide_on_mobile=”small-visibility,medium-visibility,large-visibility” class=”” id=”” background_color=”” background_image=”” background_image_id=”” background_position=”left top” background_repeat=”no-repeat” hover_type=”none” border_color=”” border_style=”solid” border_position=”all” animation_type=”” animation_direction=”left” animation_speed=”0.3″ animation_offset=”” last=”true” border_sizes_top=”0″ border_sizes_bottom=”0″ border_sizes_left=”0″ border_sizes_right=”0″ first=”true”][fusion_modal name=”read_more_lego” title=”Lego Robotics and Engineering” size=”large” background=”#f4f4f4″ border_color=”#ebebeb” show_footer=”yes” class=”” id=””]
 Children use the Lego WeDo 2.0 and Lego Mindstorms EV3 to design robots to solve real world problems. They learn to code their robots in interactive challenges. In addition to the basics of robotics, children learn key engineering principles such as force and motion, gear ratios and aerodynamics.
- Solve a real world ‘big problem’ such as pollution, animal welfare, dinosaur habitats
- Apply engineering concepts such as gear ratios, aerodynamics, motions
- Explore visual programming with the WeDo 2.0 and EV3 software
- Build robots that use motors
- Program and utilize different sensors
- Develop structural design skills
[/fusion_modal][/fusion_builder_column][fusion_builder_column type=”1_1″ layout=”1_1″ spacing=”” center_content=”no” link=”” target=”_self” min_height=”” hide_on_mobile=”small-visibility,medium-visibility,large-visibility” class=”” id=”” background_color=”” background_image=”” background_image_id=”” background_position=”left top” background_repeat=”no-repeat” hover_type=”none” border_color=”” border_style=”solid” border_position=”all” animation_type=”” animation_direction=”left” animation_speed=”0.3″ animation_offset=”” last=”true” border_sizes_top=”0″ border_sizes_bottom=”0″ border_sizes_left=”0″ border_sizes_right=”0″ first=”true”][fusion_modal name=”read_more_game_design” title=”Game Design and Design Thinking” size=”large” background=”#f4f4f4″ border_color=”#ebebeb” show_footer=”yes” class=”” id=””]
 Make games rather than play them using your own ideas! Become game developers for a day using a physical and virtual platform for creating video games in the classroom. When students build games, they become the writers, artists, designers, and developers of their own interactive stories.
It all starts with an idea. We provide resources that encourage collaboration while guiding students through a design thinking process. Students create their own 13-bit layouts, characters, and art for their game.
- turn your physical creations into digital game elements
- edit and customize everything from characters to settings
- develop interactions and behaviour between characters
- tell rich, dynamic narratives through your games
- publish them so others can play them too
[/fusion_modal][/fusion_builder_column][fusion_builder_column type=”1_1″ layout=”1_1″ spacing=”” center_content=”no” link=”” target=”_self” min_height=”” hide_on_mobile=”small-visibility,medium-visibility,large-visibility” class=”” id=”” background_color=”” background_image=”” background_image_id=”” background_position=”left top” background_repeat=”no-repeat” hover_type=”none” border_color=”” border_style=”solid” border_position=”all” animation_type=”” animation_direction=”left” animation_speed=”0.3″ animation_offset=”” last=”true” border_sizes_top=”0″ border_sizes_bottom=”0″ border_sizes_left=”0″ border_sizes_right=”0″ first=”true”][fusion_modal name=”read_more_arvr” title=”Augmented Reality Coding with Merge Cube” size=”large” background=”#f4f4f4″ border_color=”#ebebeb” show_footer=”yes” class=”” id=””]
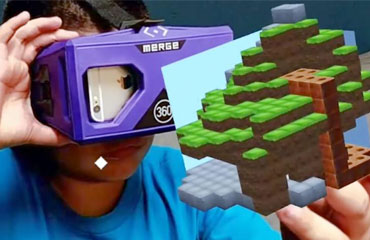 Hold a Merge Cube, and use design and coding principles to turn it into any virtual object you wish. Content creation for the best piece of tech we’ve seen in recent times.
Workshop participants use the MERGE Cube and turn it into a hologram that they can hold in their own hands! Participants learn design principles through the use of computer aided design (CAD) tools. They then learnt to code the merge cube to interact with an end user.
- Use visual block-based and intuitive programming language to code
- More advanced coders can have fun coding scripts to add interactions through JavaScript
- Use code to experiment with physics! Create simulations of physical phenomena and visualize abstract scientific concepts in 3D or in VR.
[/fusion_modal][/fusion_builder_column][fusion_builder_column type=”1_1″ layout=”1_1″ spacing=”” center_content=”no” link=”” target=”_self” min_height=”” hide_on_mobile=”small-visibility,medium-visibility,large-visibility” class=”” id=”” background_color=”” background_image=”” background_image_id=”” background_position=”left top” background_repeat=”no-repeat” hover_type=”none” border_color=”” border_style=”solid” border_position=”all” padding_top=”” padding_right=”” padding_bottom=”” padding_left=”” margin_top=”” margin_bottom=”” animation_type=”” animation_direction=”left” animation_speed=”0.3″ animation_offset=”” last=”true” border_sizes_top=”0″ border_sizes_bottom=”0″ border_sizes_left=”0″ border_sizes_right=”0″ first=”true”][fusion_modal name=”read_more_minecraft” title=”Coding with Minecraft” size=”large” background=”#f4f4f4″ border_color=”#ebebeb” show_footer=”yes” class=”” id=””]
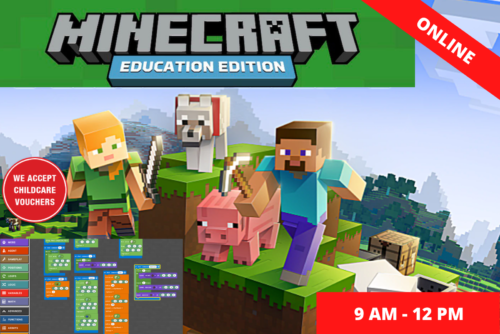
 Learn how to code in Java with Minecraft in a highly interactive learning environment!
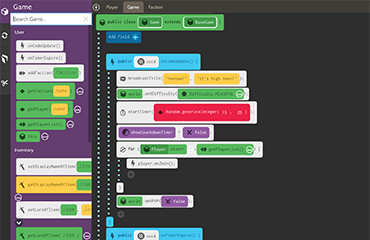
The participant can use a drag & drop interface which is highly intuitive, but the blocks also show the actual java code too. Coding concepts like variables, if/then/else statements and constructors will be learnt. More advanced participants can switch any time from block-based drag-and-drop code to Javascript.
The children can play with their creations and show their friends at the end of the session on a secure server that only the course participants on the day will have access to:
- Code in Minecraft using a Java editor
- Increase complexity with Conditions and Variables
- Learn about Boolean and Loops
- Test and debug using logic and systematic reasoning
- Connect your world and Play in Minecraft
[/fusion_modal][/fusion_builder_column][fusion_builder_column type=”1_1″ layout=”1_1″ spacing=”” center_content=”no” link=”” target=”_self” min_height=”” hide_on_mobile=”small-visibility,medium-visibility,large-visibility” class=”” id=”” background_color=”” background_image=”” background_image_id=”” background_position=”left top” background_repeat=”no-repeat” hover_type=”none” border_color=”” border_style=”solid” border_position=”all” padding_top=”” padding_right=”” padding_bottom=”” padding_left=”” margin_top=”” margin_bottom=”” animation_type=”” animation_direction=”left” animation_speed=”0.3″ animation_offset=”” last=”true” border_sizes_top=”0″ border_sizes_bottom=”0″ border_sizes_left=”0″ border_sizes_right=”0″ first=”true”][fusion_modal name=”read_more_stop_motion” title=”Stop Motion Animation” size=”large” background=”#f4f4f4″ border_color=”#ebebeb” show_footer=”yes” class=”” id=””]
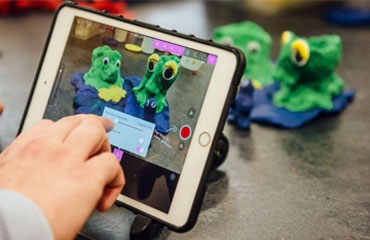
In this course, children learn to create their own stories through Wallace & Grommitt type clay figures and Lego city models. They will learn to create story boards before shooting their own movie complete with audio and special effects animations. The children will be encouraged to work in teams to bounce off ideas and become excellent story tellers. In our animation workshops, children:
- Create story boards and narratives
- Plan and create characters
- Edit video and audio tracks
- Use professional equipment and software for capture and editing
- Produce videos and animations for YouTube
- Develop a range of soft skills including presenting, planning, designing and post-production editing
[/fusion_modal][/fusion_builder_column][/fusion_builder_row][/fusion_builder_container]
Related products
-
Sale!

Blackheath – February Half Term Camp (17th Feb – 21st Feb 2025)
Price range: £57.00 through £256.50 -
Wrap Around Care – Easter Holiday Camp2025
£6.00 This product has multiple variants. The options may be chosen on the product page -
Sale!

Wimbledon – February Half Term Camp (17th Feb – 21st Feb 2025)
Price range: £75.00 through £337.50 -
Sale!
Minecraft Coding, February Half Term Mini-Camp (17th Feb – 21st Feb 2025) – AM
Price range: £35.00 through £157.50